Pea and Leek Tart

November 29th, 2008

DSC01063

So, I’ve been a bit lax with the blogging, christmas seems to have come even earlier this year and time is just slipping away from me!

I have of course, still been cooking, dutifully storing up pictures to share… I’ve also really gotten into cooking lots at the weekend so there’s always something tasty and filling at the end of the day. I made this tart in the same vein and it worked perfectly – leeks sweated down slowly and sweetly with peas thrown in, all encased in a cheesy, eggy custard and baked in flaky pastry ( although I did cheat and buy it from a shop!). Perfect for lunchboxes, or a little slither as a snack, not that is lasts that long…

Most vegetables work well in this quiche-like set up, try this Swiss Chard and Onion Tart, or Potato, onion and Goat’s cheese. Combinations on my list to try are:


Bacon, cheddar and tomatoes

Smoked mackerel and dill

Roast tomato, pesto and mozzarella

Broad bean and goats cheese

Asparagus, Lemon and Ricotta

Broccoli and blue cheese

Ingredients

300g shortcrust pastry

2-3 large leeks, finely sliced

50g butter

200g frozen peas (or fresh peas when in season)

3 eggs

400ml cream

175g cheddar, grated

1tsp dijon musard

  • Line a 24cm tart or flan tin with the pastry and bake blind
  • Boil a kettle and cover the peas in boiling water. Leave to sit for 5mins, then drain.
  • Meanwhile fry the leeks gently in the butter for 5mins until completely soft and pour in the defrosted peas, seasoning well.
  • Whisk the eggs, cream and mustard together with plenty of seasoning.
  • Once the pastry is cooked, tip the pea and leek mixture in and spread out across the whole pastry base, sprinkle over the cheese and pour over the eggy custard.
  • Bake at 190C 25 mins until the top is golden and firm to the touch.

Bookmark and Share

Simple flatbreads

November 20th, 2008

DSC00951
In the some of the larger Asian or continental shops, you can get some lovely big, soft flatbreads, I love them, so much better than pitta breads and used in much the same way. I like them with spicy chickpea cakes, or as really easy pizzas.

So, today, off I went to get some to eat with chickpea cakes, haloumi and sticky caramelised peppers. All they had was dissappointing cardboard pitta, so I thought I’d give it a go and make my own. I amalgamated a Nigella and Jamie Oliver recipe, super easy to make, flecked with aromatic cumin seeds, delicous for all your dipping needs.

Again, I urge you make bread, it really is one of the best things to have homemade, ludicrously easy and at the same time it feels like such a treat.

Ingredients

Makes 4 large flatbreads

1½sachets dried yeast
1 tbsp sugar
1 tbsp salt
1tbsp cumin seeds
1tbsp plain yoghurt
½ pint tepid water
500kg strong bread flour ( I used 300g white flour and 200g rye)
extra flour for dusting

  • Pour all the dry ingredients into a large bowl.
  • Add most of the water and the yoghurt, saving about 100ml and stir until it resembles a dough, incorporating as much of the flour as possible.
  • Tip out onto a floured surface and give it a good kneading for about 5mins until you get a smooth elastic dough. Add the rest of the water or more flour if you need to.
  • Once ready, transfer to large greased bowl, cover and leave in a warm plac until it has doubled in size. Depending on the temeperature this can take up to an hour.
  • Meanwhile, preheat the oven to 230C
  • Once its risen and puffy and doubled in size, tp it back onto the floured surface and ‘knock it back’ i.e. give it a good punch to get rid of all the air.
  • Divide into 8 and using a rolling pin, roll out to ½cm thick.
  • Place directly onto the bars of the oven and cook for about 4mins until puffy and golden.

Bookmark and Share

Marmalade

November 18th, 2008

DSC00929
I’m not particualrly a fan of marmalade, except for in bread and butter pudding, where the aromatic bitterness is divine, especially with brioche…

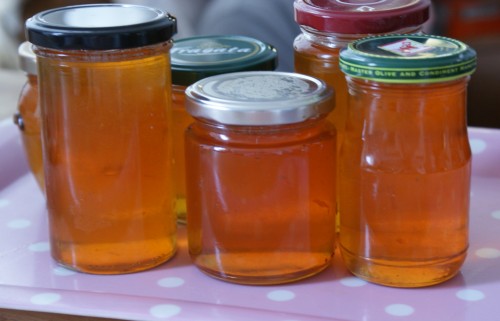
But, we did have a glut of oranges and with no other ideas for how to use them up, marmalade it was. I was thinking edible Christmas presents as the plan this year is to make a hamper for everyone with homemade treats, credit crunch presents if you will.

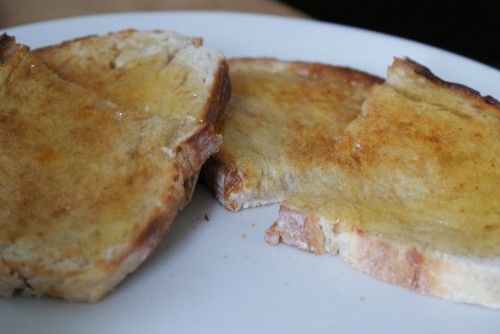
Preserve making is tricky, I won’t lie, a whole other skill apart from cooking with, it seems, complex rules that I don’t even know or understand yet. Thankfully, I made A LOT of marmalade whilst working at Pieceofplenty and learnt an awful lot there, so today wasn’t too stressful but it did cover everything in the kitchen with sticky orange goo. Judging by the fact that a certain someone has already had several slices of toast slathered in the stuff, I reckon it was a success!

DSC00934
Ingredients

Makes about 3kg

12-14 oranges
2.8l litres water
2kg granulated sugar
2 lemons

  • First sterilise the jars, wash in soapy water, rinse well and then place in a cool oven, 130C – for 15-20 minutes.
  • Wash the oranges and place in your largest saucepan. Cover with the water and boil for 1½ hours. You can do this the day before and leave the oranges, covered on the stove.
  • Once cool, remove the oranges. Cut each in ½, scoop out all the flesh and add back to the pan, pips and all.
  • Cut the lemons in ½, squeeze the juice into the pan and toss in the lemon too.
  • Boil rapidly for 20mins uncovered until reduced by half.
  • If you like smooth marmalade, discard the oranges. But if you like it chunky, and I think it looks nicer, slice the skin into thin strips.
  • Once reduced, sieve the liquid and return back to the pan. Tip in the orange skin (if using) and sugar.
  • Place a saucer into the fridge.
  • Bring to a vigorous rolling boil, stirring to dissolve the sugar. Boil uncovered for 5mins.
  • Now, here is the tricky bit, you need to test the marmalade to make sure it will set once cooled.
  • Spoon a teaspoonful of marmalade onto the saucer. Allow it to cool for a minute back in the fridge, then push it with your little finger – if a crinkly skin forms, it has reached setting point. If not, continue cooking and do more testing at 15-minute intervals.
  • Once ready, allow to cool for about 30mins so that the skin is dispersed evenly and ladle into the jars.

DSC00920

Bookmark and Share

Bacon and Cabbage soup

November 16th, 2008

DSC00884
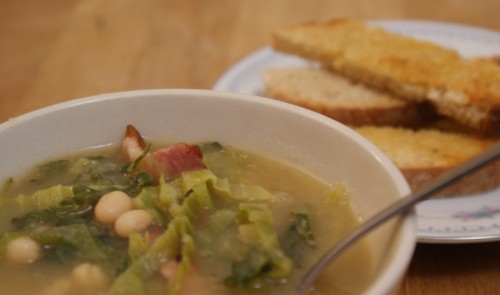
This is a hearty and healthy soup perfect for a chilly wintry day. Even better with lots of toasted potato bread slathered in buttered. I came up with this to use up yet more cabbage, along with various odds and ends in the vegetable basket.

The base is a simple vegetable soup, and here lies the beauty as you can use whatever vegetables you have to hand, we used leeks and potato, but carrot, parsnip or celery would all work equally well. Blend it up, add the finely chopped cabbage and simmer for about 5mins until soft. I then added some flagelot beans, just for added texture and to make it into more of a meal, of course leave these out if you like and you’re still left with a delicious filling soup. A bit of salty crispy bacon at the end and you’re done, optional too!

Ingredients

1 onion, chopped
3 leeks, sliced
25g butter
2 cloves glaric, sliced
500g floury potatoes peeled and cut into cubes
2 bay leaves
1l vegetable stock
½ green cabbage such as a savoy (about 200g), shredded finely
1 can flagelot beans, drained (or butter or cannellini beans), optional
8 rashers streaky bacon, cut into strips

  • Sweat the onion and leeks in the butter over a low heat for 10mins until really soft.
  • Add the garlic, bay leaves and potatoes, stir to coat in the buttery juices and pour in the hot vegetable stock.
  • Simmer for about 15mins until the potatoes are completely soft.
  • Remove the bay leaves and blend until smooth. Season to taste (easy on the salt!)
  • Pile the cabbage in, stir and simmer for about 5mins until the cabage is soft.
  • Meanwhile heat a frying pan unti very hot, fry the bacon until golden and crisp. Tip into the soup, with a smuch of the bacony juices as possible.
  • Serve with lots of bread and butter.

Bookmark and Share

Sweet Root Vegetable Stew

November 11th, 2008

DSC00874
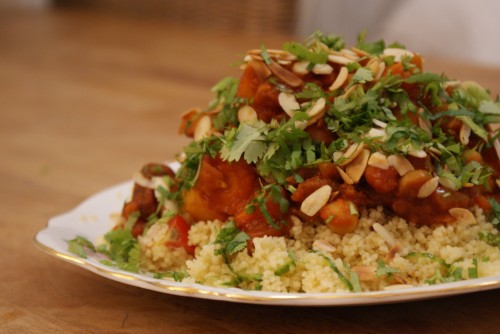
This recipe is adapted from Nigella’s Feast, my favourite book after How to be a Domestic Goddess and is a perfect way to cook all the wonderfully sweet winter root vegetables that are about now, the spicy stew goes perfectly with the starchy sweetness of the veggies. I added chickpeas because I love them and they add a bit more oomph, but you could easily subsitute 250g red lentils instead for a thicker stew. Either way this is warming winter food at its best, as usual make lots and eat leftovers the next day or freeze for a treat at a later date.

Toasted almonds and chopped coriander go perfectly, but pine nuts are delicious too as is parsley and I’m guessing pomegranate seeds would be great as well as pretty. Serve in a large bowl, pile the stew onto a big mound of couscous and sprinkle the flaked almonds and coriander on top. A dollop of yoghurt is a must.

Ingredients

serves 4

2 onions
2 carrots
3 cloves garlic
1 small red chilli
600g assorted root vegetables (carrot, swede, parsnip, pumpkin, squash, celeriac)
1 tsp turmeric
1 tsp ground ginger
1 tsp bouillon 9vegetable stock powder.
150g dried apricots, chopped
2 cans chopped tomatoes
2 cans chickpeas, drained
To serve:
200g couscous
½ lemon
3tbsp olive oil
1tsp salt
plenty of yoghurt
50g flaked almonds or pine nuts, toasted
1 small bunch (about 30g) chopped coriander or parsley

Heat a generous glug of oil in a large frying pan.
Peel the onions, garlic and carrots, chop roughly and blend in food processor with the chilli to a fine mush. Tip into the pan and fry gently.
Chop your remaining root vegetable selection roughly and add to the pan as you go along, giving it a quick stir now and then. Sprinkle over the spices and stir to coat the softened vegetables.
Now add the chickpeas and chopped tomatoes along with an extra canful of water.
Bring to the boil and leave to simmer for about 45mins.
Whilst the stew is cooking, boil the kettle and pour the couscous into a large bowl, sprinkle over the salt and give it a quick stir. Pour over 200ml boiling water, cover with a plate and leave to stand for 5mins. Once the couscous has absorbed all the water, fluff it up with a fork, squeeze over the lemon juice, pour in the oil and stir well.

Bookmark and Share

Breakfast Potato Cakes

November 9th, 2008

DSC00851
This is the perfect way to use up leftover mash, although I would actually make extra so I could fry these up for breakfast the next day, mashed potato and baked beans is possibly one of my favourite combinations, so any excuse really… all you need to do is shape the mash into little cakes, dust in some flour and fry until golden and warmed through. You end up with little cakes of creamy mash inside a crispy fried shell, heat up some beans whilst you’re frying and maybe poach an egg to sit atop the cakes, a perfect breakfast!

DSC00853
I actually made these from scratch, admittedly a bit of hassle for a Sunday morning, but I was already boiling up potatoes to make potato bread (and here’s the perfect excuse to urge you to make this divine bread!) so it was no biggy, plus I always like to get ahead on Sunday and cook up big batches of food for the week…

Ingredients
Makes enough mash for dinner and breakfast the next day!

800g organic floury potatoes
1 small green cabbage (savoy cabbage or kale also work well)
50g butter
1 clove garlic, finely chopped.
125ml milk, preferably warmed through
flour for dusting

  • Peel, the potatoes, cut into chunks and boil in salted water for about 20mins until very soft.
  • Drain well and either push through a ricer or mash throughly.
  • Add the milk and half the butter along with lots of salt and pepper.
  • Now you need to beat furiously with a wooden spoon to get a really smooth mash. Cover and set aside.
  • Meanwhile, half and quarter your cabbage, cut out the heart and slice as finely as possible.
  • Boil or steam for about 5mins (this will depend on the type of cabbage used) until soft and drain.
  • Heat the rest of the butter in a frying pan with a little oil until sizzling, add the garlic and the cabbage and fry for a few mins, season generously and stir the cabbage through the mash, making sure you get all the buttery juices in too.
  • This is where you would eat it with anything that has a sauce to soak into the mash or some fish or maybe just on its own from a bowl.
  • To make the cakes, coat your hands in flour and sprinkle some onto a plate.
  • Take a small handful of mash, roll into a ball and flatten, dip both sides in the flour and place into a hot frying pan with a little oil, fry for a few mins on both sides until golden and warmed through.
Bookmark and Share

Easy Lentil Curry with pilaf

November 4th, 2008

DSC00821
I love lentils, so cheap, tasy, filling and a portion of your 5-a-day, what’s not to love? This is a really easy, one pot curry, you can make it days in advance and it actually gets better with age. The pilaf is mellow and fragrant, and also really easy to make. I turned the leftovers into a rice salad for my lunch the next day, proper credit crunch cooking…

DSC00820
Ingredients

Lentil Curry
250g green lentils (red lentils work just as well)
½tsp turmeric
½ can coconut milk
½tsp salt
2 onions, finely chopped
1tbsp cumin seeds
3 cloves garlic, finely chopped
1 red chilli, finely chopped

  • Wash the lentils well in a sieve and tip into a large saucepan. Cover with 600ml water and add to the turmeric. Bring to the boil and simmer for 20-30mins until completely soft.
  • Add the coconut milk and salt and stir well.
  • Meanwhile, fry the onions in oil until completely soft, add the garlic, chilli and cumin seeds and fry for a minute or two more.
  • Stir your onion mixture into the lentils and enjoy!
  • Serve with rice and plenty of yoghurt.

Pilaf
1 onion, finely chopped
1 cinnamon stick
3 cardamom pods, bruised
1 bay leaf
250g basmti rice
500ml vegetable stock
25g flaked almonds
small handful parsley, chopped

  • Toast the almonds in a dry pan until golden and set aside.
  • Fry the onion in a glug of oil for a few mins, add the cinnamon, cardamom and bay, fry for a second.
  • Add the rice, stir to coat in the oniony oil.
  • Pour in the vegetable stock and bring the pan to the boil, cover and turn to the lowest heat possible. Cook for 20mins.
  • Fluff the rice, scatter with the parsley and almonds.
Bookmark and Share

Breakfast Muffins

November 3rd, 2008

DSC00816
Well, winter has arrived, we’re all wrapped up in coats, scarves and gloves have been dusted off, we even had snow! Of course, this means that in the vegetable box there are a lots and lots of carrots, onions and potatoes. This is no bad thing, I love carrots. The thing is, they seem to be going limp disappointingly quickly, which again isn’t exactly a disaster, carrots roast up so well, especially in a soup, maybe with some lentils?

This time though, I decided carrot cake was the way to go, I started off with this carrot cake recipe intending to make muffins, but then as I started, I kind of got carried away, adding some plump juicy raisins, walnuts and oats for texture, a grated apple because, well, why not? So, what came out of the oven wasn’t exactly carrot cake, but still delicious in a plainer sense, more something I can carry out the door with me in the morning to munch on on the tube, feeling a teeny bit healthy, well… all those oats, walnuts, carrots and apples!

Makes 12-15 muffins

250g sugar
200g flour
100g oats
1tsp salt
2tsp cinnamon
1 tsp bicarbonate of soda
250ml oil
4 eggs
3 medium carrots, grated
1 apple, grated
100g walnuts, chopped
100g raisins

  • Boil the kettle and cover the raisins with the hot water in a bowl.
  • Meanwhile measure out the sugar, flour, oats, salt, cinnamon and soda in a large bowl.
  • Add the oil and whisk well to combine.
  • Crack the eggs in and whisk.
  • Drain the water off the now plump raisins, add to the batter along with the carrots, apple and walnuts. Stir well.
  • Spoon the mixture into the muffin cases, bear in mind that the mixture doesn’t rise an awful lot so you can fill the cases at least 2/3 full.
  • Bake at 180C for about 20mins until golden and a skewer comes out clean.
Bookmark and Share

Rocket Pesto

October 27th, 2008

DSC00688
I’ll never understand why people buy those horrid, bland ready made pasta sauces from the supermarket, full of who knows what and expensive! Pasta is the quickest, easiest thing to cook, you can often assemble a sauce in the time it takes to cook the pasta. Like this rocket pesto, and if you make lots, you can keep leftovers in the fridge for future quick pasta dinners. Below we had it as a quick lunch with some cherry tomatoes and bit of goats cheese that was languishing in the back of the fridge.

DSC00705
This is a recipe from Cranks Bible, one of my favourite recipe books. I remember discovering this at university when rocket was the trendy new thing, what a revelation, rocket pesto is not the same as a classic pesto with the sweet creaminess of pine nuts and basil, this is altogether different; peppery, garlicky, it really packs a culinary punch.

DSC00685
Rocket, parmesan, looots of garlic, lemon juice and almonds all blended into a knobbly paste. You can then keep it in a jar in the fridge for at least a month. Eat this with linguine, some oily black olives, and a few sunblush tomatoes for a pleasing colour contrast as much as anything. Cranky also suggests stirring into a risotto, half way through cooking the rice for rocket and parmesan risotto.

Ingredients

Makes about 6 portions

3 cloves garlic
50g parmesan or strong cheddar, grated finely
50g blanched almonds
150ml olive oil
a few basil leaves (optional)
½tsp grain mustard
juice ½ lemon
1 red chilli

Throw everything into a small blender with a generous amount of seasoning and whizz until smooth. Simple as that! Adjust the amount of seasoning and lemon juice according to taste and decant into a clean dry jar.

Bookmark and Share

Amazing Mackerel on Toast

October 25th, 2008

DSC00665
Valentine Warner is a bit of a new celebrity crush of mine – reading all the hype a few months ago, I was unconvinced/jealous. But as soon as you watch a programme, his infectious enthusiasm rubs off on you and I always warm to someone as downright greedy as he is.

So, when he made this on Monday’s episode, my friends and I were practically salivating. A cucumber in my vegetable box was a sure sign that it needed to be made. First, peel a cucumber and slice thinly (I used the slicer on the side of my grater, quite an exciting discovery!) , drop them into a colander and salt generously. The idea is draw most of the water out so you’re left with lovely crispy slivers.

DSC00673
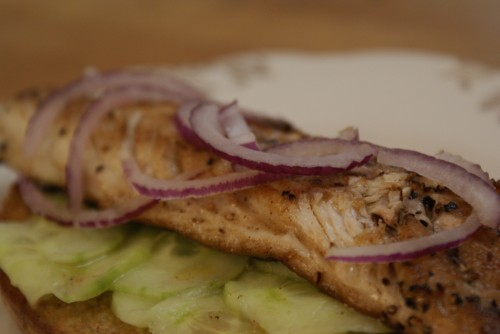
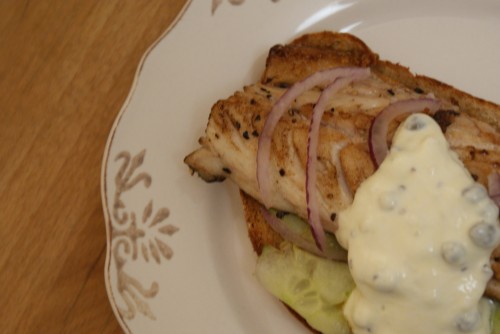
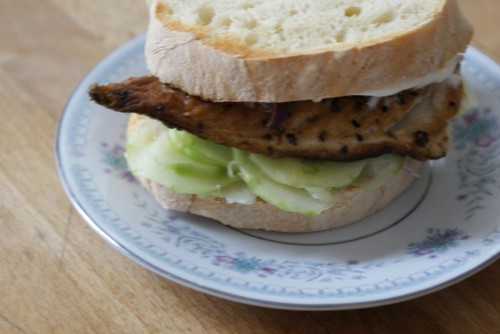
For the mackerel, all you need to do is season and fry for a few mins on each side in hot pan with a knob of butter and drizzle of oil. Toast a thick slice of sourdough, butter generously, top with a handful of cucumber, a mackerel fillet, some thinly sliced red onion and a wedge of lemon. Perfection.

Now, the icing on the cake (so to speak) was the horseradish sauce he made with it, I loved the idea of punchy sauce to go with the mackerel. needless to say, I couldn’t find fresh horseradish in Brixton, so I decided to a really simple lemony yoghurty dressing instead. A few tablespoons of yoghurt, the juice of half a lemon, plenty of seasoning, a little garlic and some capers. Really you just want something moist to go with this and you can’t really fault lemon and fish. But next time, I will be steeling myself to try the horseradish (I cry enough over onions, I’m a bit scared of horseradish…)

DSC00695

Here’s the recipe should you need it, and here’s his fabulous book that I’m stopping myself buying… I’m getting a little too click happy at the moment on Amazon, I just bought this recipe book holder though – very exciting!

Bookmark and Share